When we were getting to leave New Mexico, Matt and I thought long and hard about our belongings; what was worth moving and what was not. One of the things that didn’t make the cut was our dining room chairs. They were inexpensive parson’s chairs that we got on ebay. The chairs were so beautiful when we first got them but the leather-like fabric didn’t hold up well under the brutal treatment of our kids. We also knew the likelihood of having to replace one or more after the move was high since we had to do that last time.
My brilliant idea was to trash the chairs and get some benches after we moved. I really liked the idea of benches since we have a growing family and a little boy who likes to push chairs around to reach things that are otherwise inaccessible. No chairs, no climbing! Kill two birds with one stone.
Since I had decided to build us a new table, so I figured I could build some benches too. We needed something in the mean time, though, so we picked up some plastic bench legs from amazon.com. I screwed on some 2 x 4’s and we had two nice and sturdy benches for less than $75. Sweet!
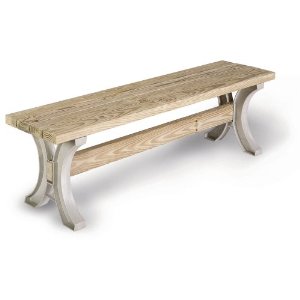
I am so happy that I did this! They are sturdy, inexpensive and I discovered that I hate benches!!
Matt sits at the end of the table, I sit right next to him. I have to get up and down so often that it becomes really annoying for me to climb over a bench over and over again rather than sitting on a chair. Not to mention that every time I get up the child next to me has to move too.
I decided that the chance of Jack moving dining chairs from one room to another (rather than from one area to another in the same room) was worth the risk. I went hunting for a bargin.
New Jersey is Craigslist GOLD!
I was able to get a solid wood table and chairs and six chairs for $60! I was only interested in the chairs but they wanted to get rid of everything. I figured I could use the wood from the table for something else (I couldn’t end up fitting the table top in the van, so we just pitched it, I kept legs and leaves though).
As you can see, these chairs have seen some better days, but at $10 a chair, I wasn’t going to be picky.
Jack thought they were a wonderful jungle gym!

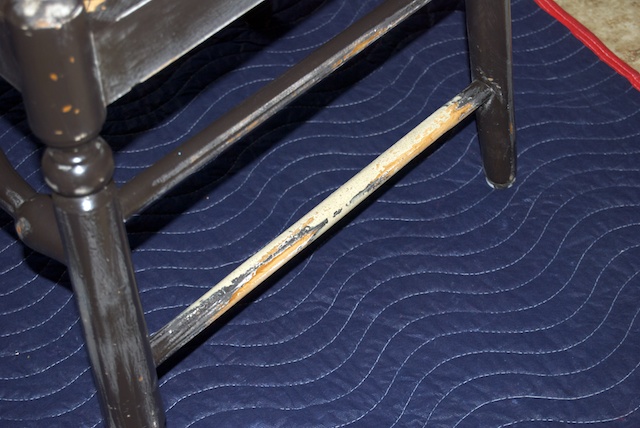
As you can see, I had some work to do to get these back into fightin’ shape! Most of the chair was good, but every bottom rung looked like it had been chewed on by an alligator.

I picked up some wood filler at Home Depot.

And after I scrubbed the chairs down I smeared the wood filler into the chewed up rungs with my fingers.

Here they are waiting to dry. Do you like my cast iron wall? Yes I do actually use this pans (the rectangle ones are bread pans, love them!)

It’s been weeks since I’ve done this and they had been patiently waiting here in my kitchen until I decided that I would rather sit on unfinished and beat up chairs then a bench for another day. These chairs now surround my table.
Matt was on call yesterday so I used the extra time to finish just one of the chairs. Matt and I were having a bit of a debate as to whether I should use latex or spray paint. I wouldn’t normally object to using the spray paint (it is better after all) but I had already bought a gallon of the latex.
I hate latex paint. It takes FOREVER to dry and even when it’s “dry” it’s not hard, has almost sticky feeling and easily peels off whatever project you used it on. I had recently read that by using flat latex paint instead of semi-gloss or gloss with a clear coat on top of it, you can avoid all of those problems.
I didn’t want to waste the paint I had already bought, so while Matt was at work I finished one chair using the paint we already had, so that if it didn’t work out as well as I hoped, we could still get the spray paint for the rest.
I sanded down the places where I had to use the wood filler (I have my real camera back in action, can you tell?)
Then got to work, here it is after two coats…
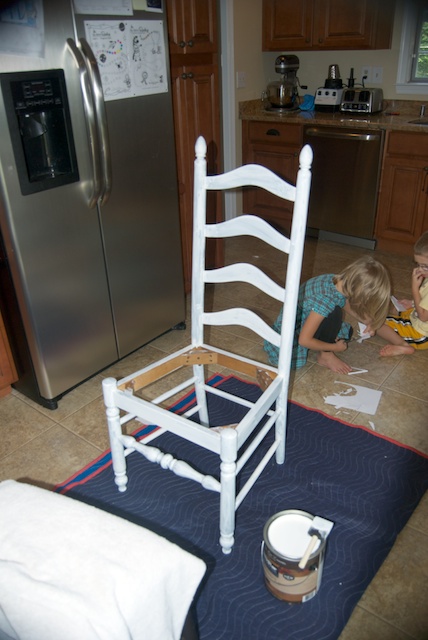
Four coats…

It took FIVE coats of paint. I used a paint and primer all in one flat paint (NOT semi-gloss or gloss).
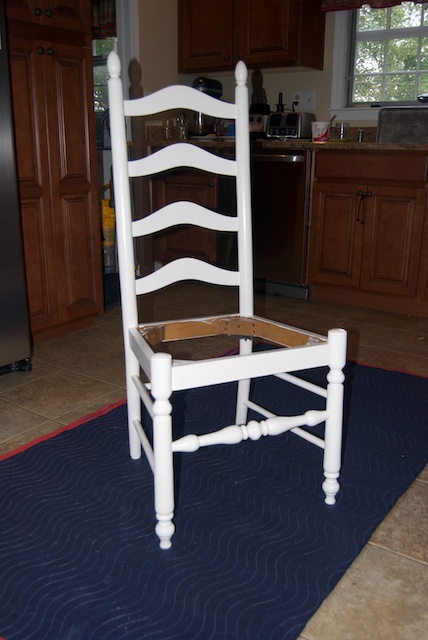
The verdict? Love it! Flat paint is the way to go baby! If you are concerned about the environment and low fumes, etc. then chalk paint or milk paint will be what you want. I am not, so flat paint is perfect for me (you may now proceed with murmuring about my heathen ways). It dries very quickly. I turned this bad boy upside down and painted the bottom half, flipped it and by the time I was done with the top half, the bottom would be dry. I was able to get two coats on at a time this way without any problems at all.
Flat paint does dry very hard. I could dig my fingernail into the dry paint and it would not leave a dent (unlike semi-gloss). By the time the fourth coat had dried it was actually pretty hard to scrap off (I know because I had to get a wild hair out). Flat paint, however is chalky feeling and very hard, if not impossible to clean. So it absolutely needs a top coat. I used polycrylic in a statin finish.
One coat of poly and I was golden! I’m sure I could put another coat on or two, but I didn’t want to.
When the top coat was drying I unwrapped the fabric I bought from fabric.com…

and stapled it right on top of the covers that were already on the seat. The fabric I chose is a nice, heavy upholstery fabric, so the darker fabric wouldn’t show through.
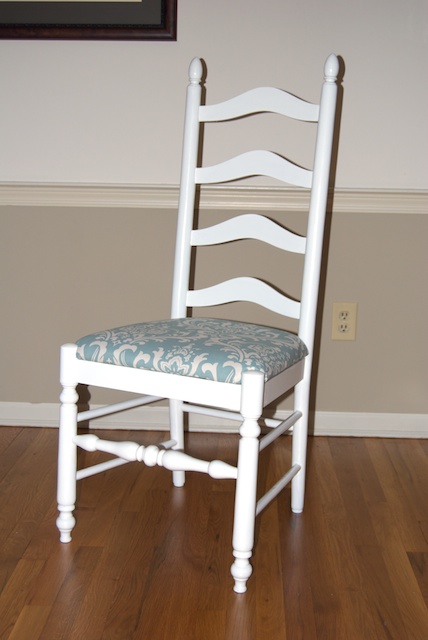
Voila! Old nasty, beat up chairs transformed into a thing of beauty!
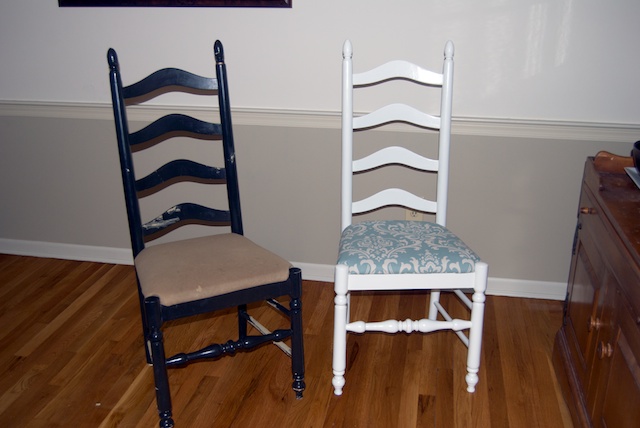
One down, five to go!
Courtney Ahroon
09/17/2021
